10 Juicing Tips to help keep you on track:
1. Have a support person
This is where the buddy system comes in. Have someone you can check in with that will help hold you accountable.
Let people around you know that you are juicing. Come prepared to social events. You could even bring something with you for everyone to try!
2. Keep foods that will tempt you out of the house
You know those sweet foods that convince you to buy them while you're waiting in line at the grocery store? Those are going to tempt you at home too. Hiding them from yourself isn't good enough. Trust me, you will find them. "Out of sight out of mind."
3. Buy in bulk
Buying in bulk will save you time and money. Check out your local farmers markets and buy in bulk from there. Always buy organic when you can.
4. Make a "meal" schedule, but take one day at a time
How many of us already make a shopping list according to your meal planning for the week? This really is a great way to stick with a routine and have something to refer to. You know what produce you have that you need to use up before it goes bad and what produce you need to buy to keep on your schedule. Taking one day at a time is the best way to keep you focused and in the moment. When we live in the moment everything is much easier. If you are new to juicing we recommend Juicing Plans from Joe Cross. He offers free plans for 3, 5, 10, & 15 day juice cleanses. This is a great place to start!
5. Food prepping; stock up on juice for times of temptation/juice on the go
Sometimes we just want to snack. There are also times when we just don't have time to juice, or let's face it, just don't want to. It's great to have a juice in the fridge you can grab for those times. Food prepping also cuts down on the time it takes to juice. Remember it's always best to cut up your produce right before using it, and drinking your juice within the first 30 minutes of juicing to get the most nutrients out of it, so we don't recommend doing this all the time.
6. Listen to your body
This should be number 1. Always, always listen to your body. As you become healthier and eat a plant based diet/juice, you will become more aware of what your body needs. You will crave the foods with the nutrients your body is craving. If your body is tired, rest. Avoid certain fruits/veggies that cause your body to react poorly. If you are not used to spicy foods, start out with small amounts of the less spicy peppers and gradually work your way up. Etc. Everyone is different.
7. Stay away from the house, get out and get some fresh air and light exercise
If you are having a food craving go on a walk or get in some light exercise. Chances are when you get back you won't feel like eating anymore. Take up yoga or meditation. Go jogging a couple nights a week. Stay active even if it means a short walk around the block. But start slow! If you don't feel like you can exercise start with just being outside. Stretch. Become aware of all the sounds going on around you. Be present. Remember to listen to your body! Don't overdue it or you won't have any energy.
8. Remember the 15 minute rule with temptation
If you can get past the first 15 minutes the feelings of temptation subside and you can keep going... until the next time. But don't worry those 15 minutes become fewer and far between.
Even though you are getting lots of water with the
produce you are juicing, it is never a bad idea to drink water in
between your juices.
9. Get enough sleep!
This is so important. When you don't get enough sleep your body shuts down. You have less energy and your body doesn't perform at optimal levels. Studies have shown that when we don't get enough sleep we tend to make poorer food choices and eat more of them. Your body is going through a detox and you may need to just take it easy during the entire juice cleanse.
10. Be kind & patient with yourself!
Remember you are amazing and can do anything you set your mind to!
For FAQ on juicing we recommend Reboot with Joe Cross

Saturday, February 28, 2015
Tuesday, February 24, 2015
Raw Vegan Healthy Peanut Butter Cups

You. Guys.
You are not going to believe how incredibly EASY these raw peanut butter cups are!! And they're healthy to boot so you don't need to feel guilty about gobbling them all up!
But let's just stop talking and get straight to the recipe shall we?
YOU WILL NEED:
Mini cupcake pan
Mini cupcake liners
RECIPE
(makes about 20-24 mini cupcake sized cups)
1 cup coconut oil - melted
1/4- 1/3 cup cocoa powder (depending on how deep of a chocolate taste you want. The more cocoa the darker it will taste)
1/4 cup raw maple syrup
Peanut butter (raw or made from scratch if you want to make sure your dessert remains 100% raw, otherwise store bought will be fine.)
Mix together the melted coconut oil, cocoa, and maple syrup. Taste test. If you want yours sweeter add more maple syrup. Pour enough chocolate to cover the bottom of the lined mini cupcake pans. It's about a spoonful per. Set in the freezer for 10 minutes to set up. Chocolate should be hard to the touch before removing from freezer. Next, spoon in a tiny dab of peanut butter in the middle of each cup. Flatten the top of the peanut butter if necessary so it doesn't stick out when you surround it with the rest of the chocolate. Fill with the remaining chocolate mixture and freeze for an additional 20-25 minutes until firm.
ENJOY!
Monday, February 23, 2015
Raw Peanut Butter Chocolate Cream Pie

This is one of those desserts where you can convince even your non-healthy eating friends to join us all on the healthy food side!
It's so good my brother in law had actual dreams about it after he went to bed!
Yup. It's THAT good!!

YOU WILL NEED:
Pie Tin
Blender
Mini Muffin Pan (for the peanut butter cups)
RECIPE:
CRUST:
1 Pie Crust (for the recipe click here) <<< It's simple- just 2 or 3 ingredients
PEANUT BUTTER BOTTOM:
Raw Peanut Butter (or healthy store bought alternative if you don't know how to make your own)
CREAM FILLING:
3 Bananas
2 cups of cashews (soaked for 2 hours) <<< soak them while you make your crust, peanut butter bottom, and peanut butter cups.
2 Tbsp raw maple syrup
1 heaping Tbsp cocoa powder
TOPPING:
Peanut Butter Cups (for the recipe click here) <<< It's a simple 4 ingredient process
DIRECTIONS:
1. Make your crust per the crust instructions.
2. Fill the bottom of the crust with a 1/2 to 1 inch layer of raw peanut butter.
3. Strain your cashews and put them in a blender. Add the rest of the cream filling ingredients and blend on high speed until creamy.
4. Pour the chocolate cream filling into your pie tin on top of the peanut butter layer and spread around evenly. You may have leftovers which is wonderful because that means you get to treat yourself!
5. Cut up your previously made peanut butter cups and sprinkle them on top of your cream filled pie.
6. Put in the freezer for 2 hours to set. Serve cold.
Will last about a week in the fridge or 2 to 3 weeks in the freezer.
ENJOY!
Date Free Raw Pie Crust

Look at that beautiful healthy crust!!
Almost every single raw dessert crust out there consists of nuts mixed with dates.
In a nutshell (pun intended- because let's face it- that's just funny) raw foodies use a nut-date mixture because it solidifies well thanks to the sticky gooey texture of the dates once they are blended. The dates also give the crust its glorious sweet taste!
But dates are pricey! And at times hard to find. I never buy mine from grocery chain stores because of the price. But I'll buy bags from wholesale distributors like Sams Club or Costco because you get more for your money- but my local wholesale distributors have been out for weeks so I had to get creative....
Fast forward to this pretty date-free crust! Nuts are filled with healthy fats and oils. So when you blend them some of those oils are released and the nuts begin sticking to each other. But not enough for a pie crust.... so I added a bit of raw maple syrup and BAM - a gooey ball of "dough" was formed!
Simply blend together your nuts of choice (almonds, pecans, walnuts, brazil nuts, and cashews are all good choices) and add a Tbsp or 2 of raw maple syrup (depending on the size of your pie and how many nuts you end up using.)
I'm so happy with the maple syrup alternative that I'll likely forgo the dates for most of my crusts from now on. Don't get me wrong- I love me a nut-date crust! But this worked just as well and was way easier to deal with than the sticky mess usually left behind in my blender after the dates have decided to glue themselves to every nook and cranny of my blender and blades.

YOU WILL NEED:
Pie Tin or Pan of choice for your goodies
Nuts
Raw Maple Syrup.
RECIPE:
1 cup Walnuts
1 cup Pecans
1-2 Tbsp of raw/real Maple Syrup
Sea Salt to taste'
DIRECTIONS:
Place nuts in a blender and blend until its nothing but crumbs. You may need to stop your blender occasionally to scrape the nuts off the sides and push them back into the center of the blades but once your "dough" becomes wet from the oils and the pieces are small enough dump it into a bowl.
Your nuts will likely be a mixture of dry powder and moist clumps. This is perfect because you don't want it too wet or once you add the maple syrup you'll just end up with mush.
At this stage add the salt (1/2 tsp or so) and the maple syrup a little at a time until you reach the consistency you like. I like mine sticky to the touch but dry enough to form into a ball.
Now comes the fun part (at least for my kids). Smash the "dough" into the pie tin bottom and form it to your pie tin. I do this by simply pushing it to the corners... and then up the corners, pulling from places where I put too much and putting more where I put too little.

Now your crust is DONE! Refrigerate until you are ready to fill it with raw yummy goodness. These also freeze really well with parchment paper and a vacuum sealer.
ENJOY!
Friday, February 20, 2015
All Natural Home Made Baby Formula

After the birth of my 3rd baby I had a really hard time breast feeding. Now, no judging me... but I went kinda crazy. Postpartum hit me hard and my emotions went hay wire! I've never had my emotions go that crazy and I had a lot of anger towards the world. I didn't understand why I had to be feeling this way. All my day to day activities became mountains to climb and everything set me off. Didn't matter if it was a big problem (like my step mom issues, finances, father problems) Or little issues (like my husband who was gone all the time at work and school, or the laundry I needed to do.) I couldn't handle any of it and I felt completely alone.
Rather than get on medication (because I tend to prefer the natural route) I had a hunch that if I quit nursing, my emotions and hormones would level off and I would go back to normal- but I was very conflicted. I have always been an advocate of breastfeeding. I nursed my other two until they were at least a year old without any problems so I felt like I was being a bad mom for wanting to quit so early on. But one day I was talking to my sister Stephanie on the phone, spilling my guts out to her and crying..... I remember specifically she said "Kristel, you are not a bad mother, and formula is not a bad thing. Your mental health and well being is just as important so why don't we look into goats milk for her" I instantly felt a huge weight off my shoulders, Of course goats milk! It is the next best thing to breast milk!
I did some soul searching and a bit of research and decided to nurse until she was 4 months old and then ease into the formula. I found a homemade goat milk formula loaded with natural ingredients that I knew would be the perfect fit for both me and my baby and by the time she was about 5 months old she was completely off of breast milk and was taking the homemade goats milk formula. My postpartum didn't go away overnight- in fact it took several months before I felt completely back to normal but I could tell that I had made the right decision as my mental state increasingly got better and better once I quit nursing.

Look how cute she is! This is when I started the formula. Her attitude changed completely! She was so much happier and less fussy.
****Please talk to you doctor before using. I am not a doctor and this is not medical advice. Just my own personal story. Please get the go ahead from your doctor first. I gave my doctor the recipe and he gave me the go ahead. He really liked all the ingredients and said it would be the perfect alternative to breastmilk for my baby.

TIPS:
I ended up changing the original recipe a bit as the oils gave her diarrhea. I talked to my doctor and he said to take out the oils and start feeding her healthy fats like avocados since she was about 6 months at the time, and was ready for solids. But at first I blended a small amount of avocados into the formula to replace the oils and eventually just got rid of the oils and fed her avocados for lunch. The recipe above includes the oils. Keep, reduce, or omit as desired.
I always made 1 pint before bed everyday and that lasted the whole next day. That way she was getting fresh milk everyday.
And like I said I removed the oils because they gave her intestinal problems. but that doesn't happen to every baby. She is just sensitive. I just blended up 1/4 of an avocado with the milk instead.
Here is a comparison of breast milk to the formula
Obviously both are much more complex than this but this gives you a good idea of how some of the simple nutrients compare to each other

I hope this helps anyone else who may be looking for formula alternatives:)
--- Kristel
Tuesday, February 17, 2015
How to Juice and in What Order
Did you know that there's a specific way you should be putting your fruits and veggies in your juicer in order to get the most out of your produce?
It's actually a really simple concept to put into practice and it goes as follows:

Simple enough right??
I almost always finish off my juices with celery. Celery is a juicer's best friends because it is cheap to buy and has an extremely high water content making it the perfect addition to your fruit and veggie drinks while also cleaning out your juicer right at the end! Win-win!
***If you have a masticating juicer the recommendations remain the same. You'll just get a higher yield because of its ability to extract more juice from the produce.***
Fellow Juicing fanatics- got any other recommendations?? We'd love to hear from you! Sound off in the comments below.
HAPPY JUICING!
Monday, February 16, 2015
Medicinal Apple Cider Vinegar
Our beautiful late mother is the woman who led our family away from the dangerous main stream diet and lifestyle and forged a new path of healing via raw foods and medicinal plants. She got her Master Herbalist Certification from Dr. Christopher's School of Natural Medicine and became a voice in our small community through her health food store, Nature's Market, and the Hurricane Valley Times where she contributed dozens of articles on how to heal your body with herbs and plant based foods. Countless lives were influenced by her amazing dedication to natural health and well being and we are so very honored to be apart of her legacy. Once a month we will spotlight an article written by her in the hopes that you too will be influenced by her knowledge, strength, dedication, and humor. So without further ado, we give you the first of many articles written by our beautiful Mother, the late Gina Lindhardt, M.H.

GINA LINDHARDT, M.H..
MEDICINAL APPLE CIDER VINEGAR- Originally published May 19, 2004

What are some of the remedies you ask? Here are a few:
ACV (straight or diluted with water) can be used for infections on the skin because it is a great antiseptic (killing germs on contact) and antibiotic (it contains bacteria which is unfriendly to infectious microorganisms). It will help cuts and abrasions heal faster and speed up the process of more serious wounds.
Cool the burning of sunburn by bathing in a tub of lukewarm water to which a cup or two of apple cider vinegar has been added.
Ease the discomfort of a sore and/or dry throat and speed up healing by sipping a syrup made of 1/2 C ACV, 1/2 C water, 1 tsp cayenne pepper and 3 tbsp honey.
Relieve itchy skin by patting on ACV. Dilute, if necessary, 4 parts water to 1 part vinegar. This is great used as a rinse for preventing dandruff and for an itchy scalp.
ACV aids digestion because it is very similar to the chemicals found in the stomach.
If taken internally, it can help relieve arthritis stiffness, and will soothe tight aching muscles and stiff joints.
Traditionally, vinegar has been the remedy of choice for treating all sorts of stings and bites from bees, wasps, and other critters. Just soak the affected area in full-strength vinegar immediately after an encounter.
ACV has been used for weight loss because it seems to normalize weight when sipped throughout the day. Dilute a tsp of vinegar to about 8 oz water at least three or more times a day.
The American Academy of Otolaryngology (head and neck surgery) suggests using a mixture of vinegar and alcohol to prevent "swimmers ear." Dilute vinegar half and half with alcohol (or water) and rinse out the ears after each swim. This will help prevent both bacterial and fungus growths.
"A splash of protein, a little dash of carbohydrates and lots of vitamins and minerals, essential amino acids and enzymes - that's apple cider vinegar!
Vinegar comes in dozens of kinds of flavors, which are used for cooking, pickling, cleaning and, believe it or not, medicine. Let's take a look at this marvelous liquid and see why people use it as an antibiotic, antiseptic and as a nutritional supplement.
Our word "vinegar" comes from the French word "vinaigre" - VIN for wine and AIGRE for sour; thus vinegar literally means wine that has gone sour. When freshly squeezed organic apple juice has been collected, it is allowed to age, sealed tightly away from the air. Natural sugars are fermented to produce alcohol. This "hard cider" is then allowed to ferment once more while left open to the air. This time, the alcohol changes to acid, creating vinegar. Technically, vinegar can be made from any liquid containing sugar. such as grapes, molasses, berries, beets, and grains among others. Apple juice is one of the oldest fluids used to make vinegar, and, because apple cider vinegar contains the healthy goodness of apples and is the most readily available, it is the one most commonly used for medicinal purposes.
Old- time beliefs about apple cider vinegar have been handed down from parent to child to grandshild over many generations. These remedies have been proven through long-time usage, although not necessarily scientifically proven; but who needs scientific proof when a good-ole-fashioned time proven remedy seems to do the trick for many people and through countless generations?
Commercially processed vinegars can be purchased but are not the same as natural organic vinegars. Good ACV is aged in wood barrels, not plastic or metal ones. Check for sediment at the bottom; if there isn't any, then the pectin and apple residues have been filtered out. Vinegar in its natural state is alive with enzymes, which are destroyed in processed and pasteurized vinegars. ACV should not be pasteurizedd, so it can still contain a host of healthy enzymes. It will be packed with amino acids, vitamins and minerals. This kinds of vinegar will be full-flavored and have a strong apple aroma.
BON APPETIT!
And remember, it is your body, so stay healthy!"
Saturday, February 14, 2015
Medicinal Apples
"An apple a day keeps the doctor away."
Happy Valentines Day! Since February is healthy heart month we figured it would be perfect to spotlight apples!

Apples are one of nature's most healing foods and medicine in one. All over the world apples are currently being used for healing. In Spain, Turkey and India they are used for a laxative. In Canada, Austria and Russia they are applied to warts. The Chinese use them for parasites, sleeplessness, gas and fevers. Other places use them as a bactericide.
Streptococcus bacteria cannot live in apple juice.

- Apples contain pectin, which can be used to remove heavy metals from the body such as lead, mercury, arsenic and copper. Pectin is also used to reduce blood.
- Apples assist in food digestion and neutralize an acidic body.
- Freshly squeezed apple juice can reduce the acidity of the stomach.
- In countries where unsweetened apple juice is used commonly, kidney stones are unheard of.
- If your children want a bedtime snack, give them an apple, which will leave their teeth clean from the gentle acids in the fruit.
- Apples are an excellent source of potassium, Vitamin C, pectin, beta-carotene, and contains calcium, iron, magnesium, and fiber among other nutrients. Almost half of the vitamin C content is just under the skin--so be careful if you peel the skin!
- Apple Cider Vinegar is made out of fermenting apples naturally. The daily use of apple cider vinegar can heal many human ailments.

Saturday, February 7, 2015
Have You Met Fully Raw Kristina?

Have you met Kristina from Fully Raw? Her recipes, videos, blog, and Houston based produce co op are an inspiration to us all!

She went fully raw 9 years ago and it completely transformed her body!
She cured herself from hyperglycemia and her body physically changed from being pencil thin to muscly, curvaceous, and visibly healthy and strong!
Her eyes even changed color from eating so pure!!

She has recipes for smoothies, salads, dinners and even delicious raw desserts that are just as sweet as their counterparts!
If you're looking for someone to inspire and motivate you to change your ways look no further!
Saturday, January 31, 2015
Why Juice?
Fridays are my day off so I try to get everything in on that day. Laundry, gym, sleeping in, ...
So today after my boot camp and yoga classes at the gym I headed over to Lins Marketplace to buy some produce for our February juice cleanse. I got a case of gala apples for $39.00! That's .99c/lb!


I found some other great deals too and always go for what's on sale. I will just have to grow my own herbs since I refuse to spend a couple dollars on 3 sprigs. Maybe that's a bit of an exaggeration but you get the idea.
I always get my carrots there too. I have yet to find a better deal than 25lbs for $14.99! Someone always asks me "what are you going to do with that many carrots?" When I reply with "I'm going to juice them" most people respond with words of encouragement, but I occasionally get the deer in the headlights look.

So, why juice?
Fresh juice gives our bodies the maximum benefits from our fruits and vegetables. This way we get all the essential fatty acids, carbohydrates, minerals, proteins, and vitamins, etc. from our produce. These nutrients are locked in the fiber of our produce which is expelled from the body. When we juice our produce, the nutrients are released, entering our bloodstream very quickly, and we are able to drink their highly concentrated nutrients.
Plus we get in the recommended amount of our daily servings of our fruits and veggies! Bonus!
So today after my boot camp and yoga classes at the gym I headed over to Lins Marketplace to buy some produce for our February juice cleanse. I got a case of gala apples for $39.00! That's .99c/lb!
I found some other great deals too and always go for what's on sale. I will just have to grow my own herbs since I refuse to spend a couple dollars on 3 sprigs. Maybe that's a bit of an exaggeration but you get the idea.
I always get my carrots there too. I have yet to find a better deal than 25lbs for $14.99! Someone always asks me "what are you going to do with that many carrots?" When I reply with "I'm going to juice them" most people respond with words of encouragement, but I occasionally get the deer in the headlights look.
So, why juice?
Fresh juice gives our bodies the maximum benefits from our fruits and vegetables. This way we get all the essential fatty acids, carbohydrates, minerals, proteins, and vitamins, etc. from our produce. These nutrients are locked in the fiber of our produce which is expelled from the body. When we juice our produce, the nutrients are released, entering our bloodstream very quickly, and we are able to drink their highly concentrated nutrients.
Plus we get in the recommended amount of our daily servings of our fruits and veggies! Bonus!
As with any cleanse at first you may feel tired, or have less energy. Everyone's bodies are different. Whatever you experience remember this is normal! This is your body working hard to get rid of all the toxins! You are on your way to a stronger body and mind free of disease! Soon you will feel so much more energized!
Start with one fresh juice a day and I guarantee you will feel the benefits!
Juicing is great for all ages, however, we do not recommend anyone under the age of 16 going on a juice fast. Seek medical attention if you experience severe symptoms or are on any medications. Never go off medications cold turkey! For additional information watch the documentary Fat, Sick and Nearly Dead.
Monday, January 26, 2015
How to heal and prevent haital Hernia and Acid Reflux
As you guys might know already I have started to eat healthy and change my diet because I have a Hiatal hernia, It is caused from severe acid reflux or vomiting. During my 3 pregnancies I was always sick, throwing up and had constant severe heartburn. and medications wouldn't help. Because I had these problems it created a severe hernia. I would get crazy chest pains. that hurt so bad I couldn't move or breathe. Anyways like in the picture the hernia is that bulge in the esophagus. and It hurts!!!
I have decided to change my diet and heal this thing with food and a juice cleanse. which is starting in a week! aahh! I have mixed feelings about the cleanse:)
I decided to give you guys some pointers on healing and helping with this pain.


First off I want to start with foods that heal and help with acid reflux. To cure a hiatal hernia you need to get rid of the acid reflux.
Antioxidant-rich fruits, such as blueberries, black berries and cherries may ease your symptoms. Foods that contain vitamin B-6 will help as well. such as almonds, spinach, kale, and beans.
some home remedies you can do at home if your having heartburn:
Ginger root- in any form has been known to help ease heartburn
Baking Soda- Yes I know. It sounds GROSS! But it actually works. I have done this so many times and it helps. You just mix a tsp of baking soda with 8 oz of water and drink it as fast as you can. It is known as an acid neutralizer.
Apple cider vinegar- This one is gross too. but its soooo good for you. It has so many health benefits. It has to be the apple cider vinegar not distilled. and organic. You can take about 1 tbls in water or plain and it is an acid neutralizer as well.

I hope that helps! Let me know if you have any thing you would like to add or if you have any questions on the matter!
---- Kristel
Thursday, January 22, 2015
Remove Gallbladder Stones Easily and Naturally

Gallbladder issues run rampant in our family. We have Aunts, Uncles, and Cousins who have all struggled. Our Dad suffered much of his life and us sisters were no exception when we grew into adulthood.
We were told by doctors that there is nothing you can do except get your gallbladder removed if it gets bad enough. They advised us all to avoid greasy and fried foods as much as possible and hope that we didn't fall victim to a gallbladder infection.
Then my dear departed Mother began her training at The School of Natural Medicine and everything changed. We became vegetarian, removed all dairy products from our home (more on that in a future post), and my Mom began to learn how to not only deal with debilitating symptoms of disease with plants and diet, but literally CURE these chronic illnesses we had all been suffering!
One of the things she learned was this gallbladder cleanse. And we all swear by it! So much so that countless friends and family members have also been cured of their gallbladder attacks using this simple and easy method.
There are many ways to cleanse yourself of gallbladder stones- and even some great ways to deal with the symptoms- (we've got more posts coming about that soon!) but until then- I highly recommend you start by trying this simple cleanse first.
 WHAT YOU NEED:
 Extra Virgin Olive Oil
1 Lemon
Shot glass - or small cup
(both organic if possible)
SO HOW DO I DO IT?
Simply squeeze the juice of one lemon into a 1/4 cup of olive oil, stir like crazy because it separates fast and chug immediately before bed. Eat nothing after. Let that be the last thing you do before your head hits your pillows.
WHAT HAPPENS NEXT?
In the morning you should pass stones in your stool and feel much better.
HOW CAN I TELL I PASSED STONES?
Gallbladder stones float and are a rainbow colored. If you see anything floating in your toilet that isn't the color of your stool, you've passed stones!
WHAT IF I DON'T PASS ANY STONES?
That's ok! Try again the next night. The first time I did it I didn't pass any stones. I was told by my physician during my last pregnancy that they discovered so many gallstones in my gallbladder during my ultrasound that they were labeling me high risk! So I tried again the second night and the next morning I passed stones! This same thing happened to my baby sister. She did it 3 nights in a row- only passing stones the 2nd and 3rd days- some as big as dimes!
WHAT DO I DO AFTER I PASS MY STONES?
Avoid greasy fattening foods!! And get on a plant based or heavy plant based diet so your gallbladder can begin rebuilding itself. If you continue to eat the way you were before, gallstones will build up again and you'll have to do another cleanse. I can't stress enough the importance of eliminating ALL greasy and fried fattening foods and eating a diet high in whole foods and produce!
So this begs the question- Have any of you tried this (or other) gallbladder cleanses?? If so, what did you do and how did it go?
Tuesday, January 20, 2015
diy raw cough drops and cooked cough drops recipe

My youngest is sick with a cough and since she is only 18m old. she wont take much. She is the pickiest eater and wont take any medicine unless its in a bottle disguised as juice. So I had to think outside the box...candy!! yes she will always eat candy. So I made two different kinds of "candy" for her. The one on the right is raw! no cooking! and the other is made up of just honey and cinnamon. cooked.
These are so simple to make, I made two for variety for her. Since I cant give her to many of the coconut oil ones because she will get diarrhea. So I made the other ones as well, and she will eat them or I pop then in a sippy or bottle for her.
Its a super easy way for her to get her medicine and soothe her cough.
These are great for adults too!
Recipe for the RAW! honey coconut oil--
- 1/4 cup raw honey
- 1/4 cup organic coconut oil
- squeezed lemon
- any desired herbs or medicine you prefer.
- I used a tincture of Uva Ursi (kills bad bacteria) and another tincture from herbs 4kids called echinasea and astrologus (immune boosting herbs)
**I put about 2 dropper full of each tincture
blend together with a hand blender until whipped get a small spoonful of cough drop and place them on parchment paper or in an ice cube tray and plop them in the freezer for 20 min.
Recipe for the cooked honey cough drops--
- 1 cup of honey
- squeezed lemon
- dash of cinnamon
- any desired herbs or medicine.
I used a tincture of Uva Ursi (kills bad bacteria) and another tincture from herbs 4kids called echinasea and astrologus (immune boosting herbs)
-tbls of coconut oil
place all ingredients in a pot and bring to a boil. then reduce heat to a simmer for about 3 min.
get a spoon full of cough drops and place on parchment paper. repeat till mixture is gone. Place in freezer for 10 min.
I keep mine in the freezer or else it will turn back to a honey consistency. Since I don't want it to be like a hard candy for my 18 m old. it just melt in her mouth pretty quickly
Hope you guys enjoy it!
-Kristel
Monday, January 19, 2015
Zucchini Pasta
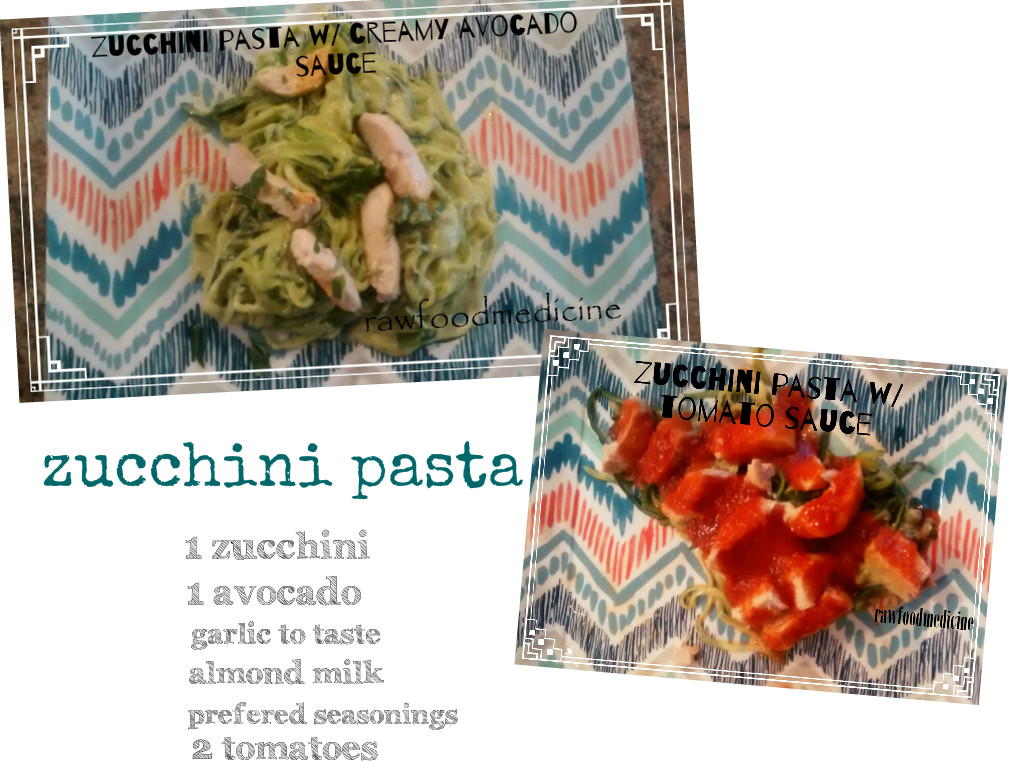 |
I really liked the avocado dressing but it does taste healthy lol.. I cant have tomato sauce. But my hubby and kids really liked it. it was made from scratch!
ok enough blabering here is the recipe:
**feeds a family of 4
4 Zucchini's (I used the veggit machine to make them into noodles) cook on skillet for a few minutes with a dash of olive oil.
Avocado dressing:
1 avocado
1 tsp of crushed garlic
1/3 cup of almond milk ( add enough to make it creamy )
pinch of salt, or to desired taste
squeezed lemon
chopped up fresh oregeno (about 1 tbls)
chopped up fresh parsely (about 1 tbls)
pinch of onion pwd and garlic pwd
add all ingredients into a food processor or blender. and blend until creamy. and add to zucchini pasta and enjoy! it might be good with some sprinkled parmesean cheese on it. but im trying to avoid dairy
Tomoto sauce
2 Tomatoes
Italian seasoning packet
dash of water
dash of salt
*optional- grilled chicken.we added some grilled chicken to the top of ours just cuz the hubs wanted some meat on it.
I hope you guys enjoy! it was a delicious meal and my kids loved the zucchini spegehetti!
its a good start to my juice cleanse that stacie is making me do in february! I have to start eating healthy now so its not much of shock to my body!
-Kristel
Centrifugal vs. Masticating Juicers

My husband surprised me with a new Hurom juicer to start my 30 days of juicing, aka"30 before 30 juice cleanse" Given that I'm starting my juice cleanse around my birthday instead of before my birthday, I'm calling it my "30 turning 30 juice cleanse". 30 days of strictly juicing goodness to cleanse out my unhealthy 20's :)
I even talked my sisters into doing it with me! It's going to be so ah-ma-zing!
So what's so special about this juicer??

Juicers typically fall into 2 categories:
Centrifugal and Masticating
Centrifugal juicers are more commonplace and generally less expensive. They typically have an upright design where food is pushed into a spinning blade on its floor. The teeth shred the food into a pulp, and the centrifugal motion pulls the juice out of the pulp and through the mesh filter, where it is funneled out of the juicer via a spigot. So basically- it shreds the produce to pulp and then through centrifugal motion pulls the juice out.
Masticating juicers squeeze and press the produce instead of shredding it, allowing for more juice to be dispensed and allowing you to juice things that centrifugal juicers typically can't handle such as leafy greens, wheatgrass, and parsley. Masticating juice lasts longer than centrifugal juice- which begins losing nutrients within after the first 20 minutes . They are also powerful enought to juice nuts! That's nuts! (lame pun intended). Masticating juicers are more expensive- however, given that you get more juice from your produce and have a wider variety of things to juice- they are (in my opinion) the better buy.
I've always used a centrifugal juicer for my juicing needs. (I used the Jack LaLanne Juicer)
Until now.
My new Hurom Juicer is so powerful I can finally squeeze wheatgrass juice at home! And it's more quiet than my Jack LaLanne juicer- which sounds like a jet plane taking off.
So when my family saw this new quiet juicer (besides the "bones crushing" sound my boys said it makes) everyone had to test it out with me. It turned our family game of UNO into a family night of juicing instead!

So that begs the question- what juicer do you use/recommend?

Natural Strep Throat Cure

This food based strep throat cure has been used in our family for over 15 years and we all swear by it! Granted, we don't tend to get strep throat anymore now that we don't drink dairy- but we've had a couple cases pop up in the last decade within our family and this is the recipe we give all our family and friends when they are looking for a natural cure.
I'm not going to lie- it hurts going down (thanks to the Cayenne!). Like, really really burns. BUT you have to ask yourself- would you rather have strep for a week+ (sore throat and all) OR would you rather suffer the temporary burn and kick that nasty strep to the curb in as quick as a day or two?
RECIPE
You will need:
GarlicRaw Unfiltered dark honey
Cayenne (any heat unit)
INSTRUCTIONS:
*Simply chop 3 cloves of garlic into tiny bits small enough to fit on a tablespoon and small enough for you to swallow whole.
*Then fill that spoon full of dark raw unfiltered honey.
*Finally, sprinkle cayenne pepper on top. Now plug your nose and swallow that entire spoonful! Repeat every few hours making sure you get in at least 4-6 doses by the end of the day.

The garlic will kill the infection so fast those tiny bad bugs won't know what hit them (Garlic is antibacterial AND antiVIRAL!). The Cayenne forces a ton of white blood cells to the surface essentially forcing your little tiny white blood cell soldiers straight to the source to kick some serious "bad guy" butt! The honey soothes the throat and helps the garlic and cayenne to stick to the back of your throat.
ADAPTATION FOR KIDS:
Obviously this recipe is not for young children- but there's a quick fix for that: Simply omit the cayenne and use garlic oil instead of chopped raw garlic. The garlic oil (about a tincture lid full) combined with the honey will create a sweet syrup your kids can safely and easily swallow.
***Know of any other natural strep throat cures? Sound off in the comments!***
Sunday, January 18, 2015
Fed Up Documentary Review
I'm a bit of a documentary freak. Especially when it comes to social causes.
I don't typically watch documentaries on nutrition as I feel like they are redundant (for my personal growth- I like to learn NEW things)
HOWEVER... for whatever reason this documentary spoke to me and I decided to give it a go.

First off- this documentary was incredibly well researched and put together. Katie Couric narrates the entire movie and you can't help but feel her passion and frustration as she guides you through one of the biggest political cover up stories ever told.

But rather than give away the entire premise- (because you should definitely watch it yourself) I'll just give you a quick synapsis as well as my thoughts on what was taught:
Fed Up follows the lives of several young kids with diabetic, prediabetic, and obesity issues. It discusses exactly how the food industry (big chain fast food, grocery stores, and big name food labels) continuously sabotage our Western views on diet and nutrition in the name of politics, money, and power.
Several leading experts discuss the age old adage of "calories in- calories out- aka diet and exercise. They agree that not only is this idea misleading but also completely false doctrine.
Basically, you can count calories all day long and exercise your heart out but it won't necessarily lead to weight loss and it especially doesn't mean you are healthy. They discuss being "Fat on the Inside"- which means that you appear skinny on the outside but your insides (heart and other organs) are laden with fatty deposits and function on levels comparable to obese patients.
But the primary message being sent throughout the entire documentary is the misconceptions about sugar. If nothing else this message should shake you to your core!


In the end all the nutritional and medical experts agree that the only way to true optimum health is a diet rich in fruits, vegetables, nuts, and seeds.
I was thoroughly engaged the entire movie. My two young daughters age 9 and 10 even got sucked into the movie! The fact that the movie follows young children with real life struggles their age makes it not only kid friendly- but also engaging for the younger audience.
I even learned something new via the politics of nutrition - which completely appalled me- but not surprisingly so as I have very little faith in politics to begin with.
Bottom line: WATCH THIS MOVIE WITH YOUR KIDS!
Cran Razzle Nice Cream

We've been playing with "Nice"cream (non dairy ice cream) flavors lately and absolutely fell in love with this one:
CRAN RAZZLE NICECREAM

1 C. cranberries
2 frozen bananas
1 C. sliced up peaches
1/4 C. raspberries
1 handful of spinach
1 C. water
*measurements are approximate
Blend and serve.
Simple post for a simple recipe.
Enjoy!
Blend and serve.
Simple post for a simple recipe.
Enjoy!
Sunday, January 11, 2015
COLD AND FLU JUICE

I've had a dry unproductive cough for almost a month straight. It started as a cold but then quickly traveled down to my lungs and decided to simply camp out there. I felt like I had a tickle in my lungs/throat that just wouldn't go away!
So I got this recipe from my dear friend who swore by it and decided to make enough for me to drink for a couple days.
By the next day I was coughing up stuff (gross, but yay!!) and the cough turned productive! (Coughing is one of the many ways your body tries to rid itself of impurities, viruses, and excess mucous. So a productive cough, although uncomfortable, should not be suppressed but rather encouraged!) By day 3 I was over it. I didn't take any supplements, didn't do a cleanse, didn't change or omit anything from my diet... all I did was drink a quart or two of this juice for 3 days. Incredible to say the least.
It's got a semi strong aftertaste- but is still very sweet at delicious! I didn't have to plug my nose or chug it down with a chaser which was a bonus. Just simply sipped on it all day:)
RECIPE:
1 pineapple
2 lbs carrots
4 apples
3 cloves garlic
1- 2" inches of ginger (eyeball it)
Juice in your preferred blender. (I use the Jack LaLanne Blender)
THE SCIENCE BEHIND IT (from what I gather- I'm no doctor)
*Pineapple & Carrots are high in Vitamin C and help alkalize your body.
*Apples are cleansing and also help with your PH levels
*Garlic is antiviral/antibacterial. 3 cloves (not bulbs!) just cloves, of garlic is = to one dose of penicillin without the nasty side effects!
*Ginger is an expectorant and great for the respiratory tract. It's also great for the tummy and aids in digestion.
If you know of any other cough/cold juicing recipes let us know in the comments!
- Steph
Subscribe to:
Posts (Atom)